Android Custom View—FloatingActionButtonMenu
這次要實作的是一個簡易的FAB Menu
首先定義FAB,繼承ImageView,隻有背景色,圖檔和高度三個屬性,很簡單,就不多說了
public class FloatingActionButton extends ImageView {
    final float scale = getResources().getDisplayMetrics().density;//Convert dp to pixel
    private int backgroundTint;
    private float elevation;
    private int icon;
    public FloatingActionButton(Context context) {
        this(context,null);
    }
    public FloatingActionButton(Context context, AttributeSet attrs) {
        this(context, attrs, );
    }
    public FloatingActionButton(Context context, AttributeSet attrs, int defStyleAttr) {
        super(context, attrs, defStyleAttr);
        TypedArray array=context.obtainStyledAttributes(attrs,R.styleable.FloatingActionButton);
        backgroundTint=array.getColor(R.styleable.FloatingActionButton_backgroundColor, getResources().getColor(R.color.green));
        elevation=array.getDimension(R.styleable.FloatingActionButton_fabelevation, f);
        icon=array.getResourceId(R.styleable.FloatingActionButton_fab_icon, R.mipmap.ic_launcher);
        setIcon(icon);
        if(Build.VERSION.SDK_INT>)
            setElevation(elevation);
        array.recycle();
        setBg(backgroundTint);
    }
    @Override
    protected void onMeasure(int widthMeasureSpec, int heightMeasureSpec) {
        super.onMeasure(widthMeasureSpec, heightMeasureSpec);
        setPadding((int) ( * scale), (int) ( * scale), (int) ( * scale), (int) ( * scale));
        setMeasuredDimension((int) ( * scale), (int) ( * scale));
    }
    private void setBg(@ColorInt int color) {
        OvalShape shape=new OvalShape();
        ShapeDrawable drawable=new ShapeDrawable(shape);
        drawable.getPaint().setColor(color);
        setBackground(drawable);
    }
    public void setIcon(@DrawableRes int resId){
        Bitmap b=BitmapFactory.decodeResource(getResources(),resId);
        setImageBitmap(b);
    }
}
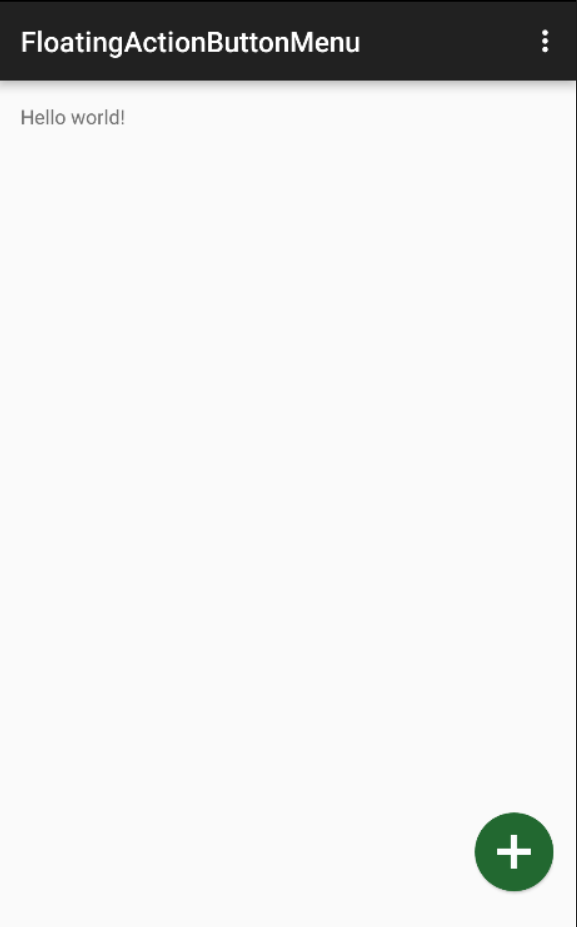
它是這樣的

第二步來定義FAB Menu,繼承自ViewGroup,利用ValueAnimator來實作動畫效果
public class FloatingActionButtonMenu extends ViewGroup implements ValueAnimator.AnimatorUpdateListener {
    int h;
    final float scale = getResources().getDisplayMetrics().density;
    private int count;
    boolean show = false;
    public FloatingActionButtonMenu(Context context, AttributeSet attrs) {
        this(context, attrs, );
        FloatingActionButton b = new FloatingActionButton(context);
        b.setIcon(R.mipmap.add);
        addView(b);
        b.setOnClickListener(new OnClickListener() {
            @Override
            public void onClick(View v) {
                start();
            }
        });
    }
    public FloatingActionButtonMenu(Context context, AttributeSet attrs, int defStyleAttr) {
        super(context, attrs, defStyleAttr);
    }
    @Override
    public void onLayout(boolean changed, int l, int t, int r, int b) {
        count = getChildCount();
        int height = ;
        for (int i = count - ; i >= ; i--) {
            View child = getChildAt(i);
            if(child.getVisibility()==GONE)continue;
            child.layout(, (height), (int) ( * scale), (int) (height +=  * scale));
            height +=  * scale;
        }
    }
    @Override
    protected void onMeasure(int widthMeasureSpec, int heightMeasureSpec) {
        super.onMeasure(widthMeasureSpec, heightMeasureSpec);
        count = getChildCount();
        h = ;
        for (int i = ; i < count; i++) {
            View child = getChildAt(i);
            if (child.getVisibility() == GONE) {
                continue;
            }
            measureChild(child, widthMeasureSpec, heightMeasureSpec);
            h += child.getMeasuredHeight();
            h +=  * scale;
        }
        setMeasuredDimension((int) ( * scale), h);
    }
    public void start(){
        ValueAnimator animator = ValueAnimator.ofInt(, );
        animator.setStartDelay();
        animator.setDuration();
        animator.addUpdateListener(this);
        animator.start();
    }
    @Override
    public void onAnimationUpdate(ValueAnimator animation) {
        int d = (int) animation.getAnimatedValue();
        if (d ==  && !show) {
            for (int i = getChildCount() - ; i > ; i--) {
                View cv = getChildAt(i);
                cv.setAlpha();
                cv.setVisibility(VISIBLE);
            }
        }
        int i;
        for (i = getChildCount() - ; i > ; i--) {
            View v = getChildAt(i);
            if (show) {
                v.setAlpha(f - *d/f);
            } else {
                v.setAlpha(*d/f);
            }
        }
        View v = getChildAt();
        if (!show)
            v.setRotation( * d / );
        else v.setRotation( -  * d / );

        if (d ==  && show) {
                for (i = getChildCount() - ; i > ; i--) {
                    View cv = getChildAt(i);
                    cv.setVisibility(GONE);
                }
        }
        if(d==)
            show=!show;
    }
}
注意這兒:
child.layout(...)
layout的定義是這樣的
* @param l Left position, relative to parent
     * @param t Top position, relative to parent
     * @param r Right position, relative to parent
     * @param b Bottom position, relative to parent
也就是說是相對于父類來定位的,不要搞錯了,我在寫的時候就因為這兒出了問題找了好久
現在你可以在layout裡使用它了
<RelativeLayout xmlns:android="http://schemas.android.com/apk/res/android"
    xmlns:tools="http://schemas.android.com/tools"
    xmlns:custom="http://schemas.android.com/apk/res-auto"
    android:layout_width="match_parent"
    android:layout_height="match_parent" android:paddingLeft="@dimen/activity_horizontal_margin"
    android:paddingRight="@dimen/activity_horizontal_margin"
    android:paddingTop="@dimen/activity_vertical_margin"
    android:paddingBottom="@dimen/activity_vertical_margin" tools:context=".MainActivity">

    <TextView android:text="@string/hello_world" android:layout_width="wrap_content"
        android:layout_height="wrap_content" />
    <hust.xujifa.floatingactionbuttonmenu.FloatingActionButtonMenu
        android:layout_alignParentEnd="true"
        android:layout_alignParentBottom="true"
        android:layout_width="wrap_content"
        android:layout_height="wrap_content">
        <hust.xujifa.floatingactionbuttonmenu.FloatingActionButton
            android:visibility="gone"
            custom:fab_icon="@mipmap/ic_launcher"
            custom:backgroundTint="@color/green"
            custom:elevation="4dp"
            android:layout_width="wrap_content"
            android:layout_height="wrap_content" />
        <hust.xujifa.floatingactionbuttonmenu.FloatingActionButton
            android:visibility="gone"

            android:onClick="click1"
            custom:fab_icon="@mipmap/ic_launcher"
            custom:backgroundTint="@color/green"
            custom:elevation="4dp"
            android:layout_width="wrap_content"
            android:layout_height="wrap_content" />
        <hust.xujifa.floatingactionbuttonmenu.FloatingActionButton
            android:visibility="gone"

            custom:fab_icon="@mipmap/ic_launcher"
            custom:backgroundTint="@color/green"
            custom:elevation="4dp"
            android:layout_width="wrap_content"
            android:layout_height="wrap_content" />
    </hust.xujifa.floatingactionbuttonmenu.FloatingActionButtonMenu>


</RelativeLayout>
至此就全部完成啦,可以去我的github上下載下傳源碼,這隻是一個簡單的架構,你可以加上更多你想要的功能