一、下載下傳ActiveMQ
位址:http://activemq.apache.org/download-archives.html
目前是5.15.2版本 
二、ActiveMQ目錄
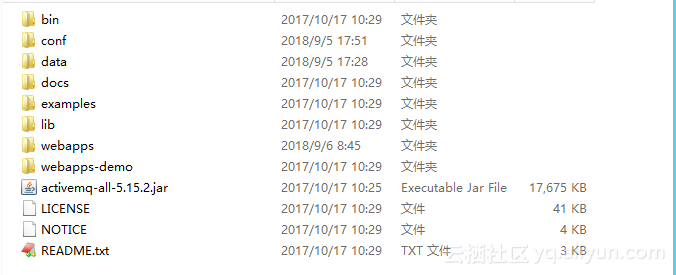
bin:可執行檔案
  conf:所有配置檔案
  data:log日志檔案,kahadb持久化資料庫檔案存儲,臨時檔案
  docs:文檔
  examples:小例子
  lib:jar包庫
  webapps: activemq 監控台web程式
三、ActiveMQ啟動
1.運作bin\activemq.bat ,但是需要通過指令行視窗啟動
    cd /d bin目錄下
activemq start 
2.根據作業系統位數,選擇win32/win64直接運作actviemq.bat
四、重點配置
1.MQ相關配置:activemq.xml
- 通信協定配置
<transportConnectors>
<!-- DOS protection, limit concurrent connections to 1000 and frame size to 100MB -->
<transportConnector name="openwire" uri="tcp://0.0.0.0:61616?maximumConnections=1000&wireFormat.maxFrameSize=1048576000"/>
<transportConnector name="amqp" uri="amqp://0.0.0.0:5672?maximumConnections=1000&wireFormat.maxFrameSize=1048576000"/>
<transportConnector name="stomp" uri="stomp://0.0.0.0:61613?maximumConnections=1000&wireFormat.maxFrameSize=1048576000"/>
<transportConnector name="mqtt" uri="mqtt://0.0.0.0:1884?maximumConnections=1500&wireFormat.maxFrameSize=1048576000"/>
<transportConnector name="ws" uri="ws://0.0.0.0:61614?maximumConnections=1000&wireFormat.maxFrameSize=1048576000"/>
</transportConnectors> (1)uri中Port:通信協定端口号
(2)uri中maximunConnections:通信協定最大連接配接數
(3)url中wireFormat.maxFrameSize代表支援協定的“一個完整消息”的最大資料量(機關為byte)
2.增加使用者認證插件
<shutdownHooks>
        <bean xmlns="http://www.springframework.org/schema/beans" class="org.apache.activemq.hooks.SpringContextHook" />
    </shutdownHooks>
    <!--此部分為添加的-->
    <plugins>
       <simpleAuthenticationPlugin anonymousAccessAllowed="true">
             <users>
                <authenticationUser username="admin" password="admin" groups="users,admins"/>
             </users>
       </simpleAuthenticationPlugin>
    </plugins>
添加登入使用者名與密碼,及使用者所屬使用者組
五、日志
路徑:activemqdata目錄下
六、通路監控台(old)
預設通路位址:
[localhost:8161]()
此端口亦可修改:jetty.xml中找到port進行修改
(一)ActiveMQ :windows 環境搭建及配置
到此activemq中間件在windows下已經搭建完成
後續繼續,《[ActiveMQ搭建最新的監控工具hawtio》]()